

How to check the fit of an adjustable weighted hula hoop
Check an adjustable weighted hula hoop by matching its stated fit range to your measurement, fastening it as directed, and testing whether you can breathe and move comfortably without the ring pinching or slipping. Adjust detachable sections only as the instructions allow, then repeat the check. For a 2026 purchase, confirm the current sizing details before ordering; a section count alone does not tell you whether a hoop will fit.
- An adjustable weighted hula hoop should stay positioned without pinching, slipping, or restricting normal breathing.
- Athleticsforhealth’s Adjustable Weighted Hula Hoop suits exercisers seeking a detachable design; confirm its fit range before buying.
- The listed 24-section design describes construction, not a guaranteed waist measurement.
- Check the fastening and moving parts separately from the ring’s fit.
Why fit matters
A hoop that closes around you has passed only the first check. You still need to establish whether it stays positioned, allows comfortable movement, and works without clothing getting caught.
For your 2026 equipment checklist, separate body fit from mechanical function. A comfortable ring with a poorly engaged connection is not ready to use. Neither is a securely closed ring that presses uncomfortably against you.
Athleticsforhealth lists an Adjustable Weighted Hula Hoop with a detachable, 24-section design. That gives you a specific construction feature to assess, but you still need the product’s sizing information and instructions to choose a configuration.
How do you check the fit of an adjustable weighted hula hoop?
Use this sequence before starting a workout. Follow the instructions supplied with your particular hoop wherever its fastening, placement, or adjustment method differs.
1. Check the stated sizing information
Find the manufacturer’s fit range and measuring instructions. Look for a circumference measurement rather than relying on photographs, clothing sizes, or the word adjustable.
Check the measurement units too. If your tape and the listing use different units, convert your measurement before comparing them. Do not compare a circumference measurement with a diameter measurement; they describe different dimensions.
If the listing does not give a usable fit range, ask for it before ordering. Detachable construction does not establish the smallest or largest supported fit.
2. Measure where the instructions say to wear it
Stand normally and use a flexible measuring tape at the specified position. Keep the tape level and avoid pulling it tight enough to compress your body.
Measure over the type of clothing you expect to wear if the instructions call for that. A measurement taken over a thick waistband is not interchangeable with one taken over a thin top.
Do not hold your breath or pull your stomach inward to reach a smaller measurement. You need a fit that works while you breathe normally, not only while you pose for the tape.
3. Adjust the ring using the approved method
If your model uses removable sections, add or remove them according to its instructions. Make adjustments while the hoop is off your body unless the manufacturer explicitly directs otherwise.
Keep the removed pieces together so you can reverse the change. Do not force a connection, substitute a piece from another hoop, or alter the fastening to create an in-between size.
A section that looks similar is not proof of compatibility. Use only the parts specified for your model.
4. Fasten it and check every connection
Put the hoop on at the instructed position and close the fastening fully. Inspect each connection, not just the one you opened to put it on.
Look for incomplete engagement, visible damage, or a joint that separates during the instructed check. Do not assume that a sound or click proves correct fastening unless the instructions identify it as the confirmation signal.
Stop the fit check if a connection will not engage properly. Tightening the hoop around your body does not fix a faulty joint.
5. Check breathing, pressure, and position
Stand upright, breathe normally, and make small, comfortable movements. Notice whether the ring presses sharply, pinches skin, catches clothing, or shifts away from the intended position.
Do not use a universal finger-gap rule unless the manufacturer supplies one. Different constructions need their own fitting directions, so an invented clearance measurement adds confusion rather than certainty.
You should not need to brace your stomach continuously to keep the hoop in place. If that is the only way it stays positioned, stop and reassess the configuration and placement.
6. Test movement before continuing
After the static check, try the starting movement described in the instructions. Keep the surrounding space clear of furniture, people, pets, and loose belongings.
If your model has a moving weight or carriage, check its operation separately. A ring can fit your body while an external component catches on clothing or encounters an obstruction.
Stop if the ring slips, a joint opens, movement catches, or you feel pain. Correct the cause before trying again; do not try to overcome a fitting problem by moving harder.
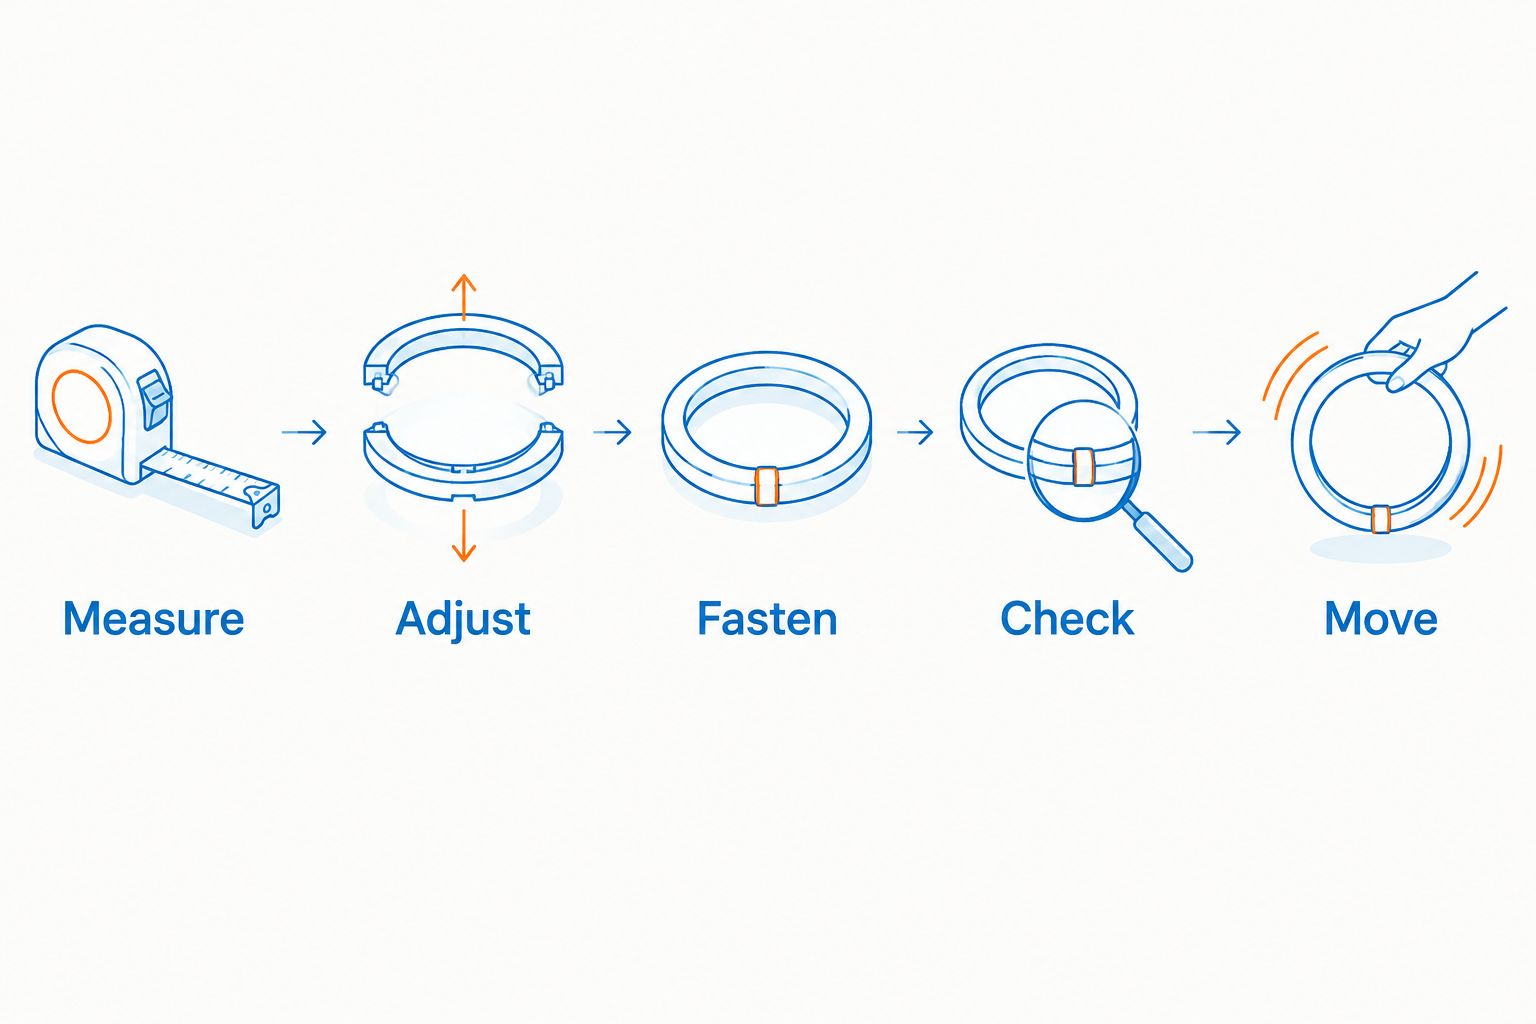
The sequence is simple: measure, adjust, fasten, check, then move. Keep that order so a movement test does not become your first inspection of an unsecured hoop.
What does a good fit feel like?
A useful fit check looks at position, pressure, and movement together. Do not judge the hoop only by whether you can close it or whether it stays up while you stand still.
| Fit condition | What you notice | What to do |
|---|---|---|
| Too tight | Pinching, uncomfortable pressure, or restricted normal breathing | Stop and reassess sizing and adjustment |
| Too loose | The ring shifts away from its intended position during the instructed movement | Stop and check placement and configuration |
| Ready for a movement check | Connections are engaged, position is maintained, and breathing is comfortable | Test the instructed starting movement |
| Mechanically incorrect | A joint separates or a moving component catches | Stop and resolve the mechanical issue |
Comfort does not replace a fastening check, and secure fastening does not excuse discomfort. Both conditions need to be satisfied.
Avoid treating pressure as evidence that the equipment is working better. A fit check establishes whether the hoop fits and functions as directed; it does not measure workout effectiveness.
What the 24-section design tells you in 2026
The supplied listing describes the Athleticsforhealth Adjustable Weighted Hula Hoop as having 24 detachable sections. The stated purpose of that construction is adjustment and storage between uses.
Best for: everyday exercisers who want a hoop with detachable construction. The practical benefit is the ability to change the ring configuration as instructed and take it apart for storage.
The limitation is equally important: 24 sections do not establish a waist-size range, a section length, or the adjustment achieved by removing one piece. Those details need their own specifications.
Nor does detachable construction guarantee that every possible configuration is approved for use. Follow the model’s assembly limits rather than assuming that any ring you can close is an acceptable setup.
When considering this hoop for your 2026 routine, judge it on that documented feature rather than on promised results. Choose it only after confirming that its supported sizing matches your measurement.
Why adjustable weighted hula hoop fit varies
Your body measurement is the starting point, but it is not the whole fitting process. These practical factors explain why an apparently suitable hoop still needs an on-body check:
- Wearing position: Measuring at one point and wearing the ring at another makes the original comparison less useful. Use the position specified in the instructions.
- Clothing: Thick waistbands, pockets, drawstrings, and loose fabric change what sits between you and the ring. Check the clothes you actually intend to wear.
- Section configuration: Removable sections change the assembled ring. Use the model’s supported configurations instead of guessing an intermediate fit.
- Connection engagement: A partly engaged joint is an assembly problem, not a sizing adjustment. Inspect the connections before testing movement.
- Movement: Standing still does not show whether the ring shifts during use. Complete the instructed movement check before settling on a configuration.
Change one fitting variable at a time. If you alter the placement, clothing, and section arrangement together, you lose track of which change resolved the problem.
What if the next section makes the hoop too tight?
Do not force a choice between slipping and uncomfortable pressure. Recheck your measurement, the specified wearing position, and the approved configurations before trying again.
If one configuration slips and the next restricts you, ask the seller or manufacturer whether the model supports an appropriate fit. Do not bridge the difference with improvised padding, altered joints, or incompatible sections.
A product can be adjustable without fitting every person. Choosing a different size or design is a better decision than modifying a fastening to make an unsuitable ring close.
Should you check the fit over workout clothes?
Check the fit with the clothing specified by the instructions and representative of what you will actually wear. Keep loose fabric and dangling cords away from moving components.
A fitted top makes it easier to see whether fabric is bunching at the ring. You do not need to buy special clothing solely to complete the check; you need an unobstructed view and a setup consistent with the instructions.
If changing your clothing changes how the ring sits, repeat the fit check. Do not assume the previous configuration is still correct.
How do you check the hoop after taking it apart?
Reassemble the hoop according to its instructions and inspect all the connections again. Storage does not preserve an earlier fastening check once the ring has been disassembled.
Keep detachable parts together and check them for visible damage before assembly. If a piece is damaged or no longer engages correctly, seek the specified replacement or support rather than forcing it into place.
After assembly, repeat the breathing, position, and movement checks. Your last successful configuration is a useful reference, not a substitute for checking the rebuilt hoop.
Before you decide to keep the hoop
Use your first fitting session to answer a practical question: does this equipment suit the routine you will actually follow? Assembly and adjustment are part of ownership, not details to ignore until later.
Make a short checklist:
- Can you identify the supported fit range and wearing position?
- Can you assemble and fasten the ring without forcing its parts?
- Does it remain positioned during the instructed starting movement?
- Can you breathe comfortably without pinching or sharp pressure?
- Can you inspect, disassemble, and store it as directed?
Keep the instructions with the removable sections. That makes the next setup easier to check and helps you avoid relying on memory for the fastening method.
FAQ
How tight should an adjustable weighted hula hoop be?
An adjustable weighted hula hoop should stay at its instructed position without pinching or restricting normal breathing. Follow the model’s fitting directions rather than using an unsourced finger-gap rule.
How many sections should I remove from my weighted hula hoop?
Remove only the sections needed to reach a supported configuration that fits your measurement. The correct number depends on the model’s sizing instructions, not on section count alone.
Does a 24-section weighted hula hoop fit everyone?
No, a 24-section design does not establish universal fit. The Athleticsforhealth listing identifies detachable construction, so confirm the supported fit range before choosing it.
Why does my adjustable weighted hula hoop keep slipping?
Check the hoop’s placement, section configuration, and clothing when it slips. Stop the movement test and reassess those factors instead of tightening it until it becomes uncomfortable.
Can I use the hoop if a connector will not close?
Do not use the hoop if a connector will not engage as directed. Check the assembly instructions and seek product support rather than forcing or modifying the joint.
Should I wear a weighted hula hoop directly against my skin?
Follow the manufacturer’s instructions for clothing and skin contact. Check for pinching and keep loose clothing away from moving parts.
Can I check my hoop’s fit without starting a full workout?
Yes, begin with measurement, assembly, and a stationary comfort check before trying the instructed starting movement. A stationary check alone does not establish that the hoop stays positioned during use.
One last thing
Keep a note of the configuration that fits, but check the fastening every time. Record the assembled section arrangement and the clothing used for your successful fit check.
For your 2026 routine, make inspection part of setup rather than part of troubleshooting. Remembering the right configuration saves guesswork; checking the connections confirms that you rebuilt it correctly.